Frequently Asked Question
Got a question about your current or potential irrigation system? Below is a list of frequently asked questions and answers.
As always, if you cannot find the answer to your question below or if you need additional assistance call our toll free hotline at 800-231-5117.
Sometimes a sprinkler system has not been designed properly to provide adequate coverage for your yard. To achieve the best results, the spray pattern from each sprayhead should overlap the spray patterns of the heads next to it. Lawn Genie recommends overlapping the spray patterns 100% of the radius (50% of the diameter). You accomplish this overlap by spacing the heads at the distance they will spray (i.e.- if your heads spray 10 feet, space them 10 feet apart). This constitutes what is known as "Head-to-Head" coverage, which evenly distributes water across your yard. Applying “head-to-head” coverage may result in what seems like a lot of sprayheads, but this technique can actually save you quite a bit in water bills over the years. You will not need to run your system as long in order to get sufficient water coverage. The combination of the right heads with the proper spacing should result in balanced water distribution, and ultimately a beautiful looking lawn you can enjoy.
Usually not. A sprinkler system normally uses quite a bit of water, measured in gallons per minute (GPM). Most sprinkler zones will use from 8 to 15 GPM as they operate. A hose bibb cannot supply nearly that amount of water, due to the size limitations within the hose bibb itself, and often due of the size of the pipe running to the hose bibb. You will need to measure the available GPM at the hose bibb to see how many heads can run at one time (each head operates at a specific GPM). Check Review the Lawn Genie Planning & Installation Guide for instructions on how to measure your GPM rate.
Yes. Both the mechanical and computerized timers install in much the same way. Just follow the installation instructions that come with your new timer.
A sprinkler timer generally requires 3 important settings before it will operate: Start Time, Run Time, and Days to Water. Since they are all necessary, let’s look at all three.
- Start Time refers to the time of day that the sprinklers will begin watering. Start times tell the timer at what time to start each watering program, rather than how long to run each sprinkler zone. The timer will run each zone sequentially, one after the other, at each start time, and for the duration you have specified. When one zone is finished, the next one will start. This is called a complete Cycle. The Start Time is the point in time that the Cycle starts. If you want the same series of valves to run more than once in the same 24 hour period, you must assign a second start time to that program.
- Run Time is the length of time that each zone will run. Run times are assigned to each program. They tell the timer how long to run each zone. Different timers will allow slightly different run times, but all of them will be set in terms of minutes.
- Days to Water refers to the days of the week that your system will run. Some timers enable you to choose specific days of the week, such as Monday/ Wednesday/ Friday, while with others you choose Every Day/ Every Other Day/ Every Third Day, etc.
A computerized sprinkler timer should have a battery back-up to maintain the program during a power outage. Check behind the front panel of the timer (there is usually an access panel) where you should find connections for 9 volt, AAA, or AA batteries. Read any instructions you may find, since some timers require rechargeable batteries, while others require alkaline. Connecting a good battery should solve your problem, assuming your power outages are not so long and so often that your battery can not keep up (a new battery should normally last about a year).
The next time the zone will not shut down, unplug your timer. If the watering stops, you have a problem with your timer and should have it checked or replaced. If after the timer is unplugged the sprinklers still do not stop running, you may have a stuck valve. If you’re not sure which valve controls the running sprinklers, feel the valves, and you should be able to tell which valve water is running through. Some valves will have a flow control feature, (i.e.- a shutoff on the valve, which might look like a knob, tee handle, or sometimes like a screw head on the top of the valve). If your valve does have this flow control feature, try shutting it off by turning the flow control handle. If the zone shuts off, you’ve found the right one. There are two things will typically cause a stuck valve. The first is debris, like a rock or stick, which has become lodged under the vlave diaphragm (i.e.- a large rubber disk inside the valve), or the other is that the valve’s diaphragm itself is faulty or damaged, becoming hard or cracked due to age or water conditions. Either problem will require shutting off the water supply to the valve, disassembling the valve, and correcting the problem by either clearing the debris or replacing the diaphragm.
I need to replace a couple of old sprinkler valves. How can I tell the direction of flow on a valve?
Most valves are marked with a arrow showing the direction of flow, with the main supply line being connected to the input side, and the sprinkler lateral line being connected to the output side. If you are unable to find an arrow, you should be able to apply a couple rules of thumb. One is that the solenoid is normally placed on the outlet side. The other is that when you disassemble the valve and look inside, the side that is beneath the diaphragm seat is normally the input side. Finally, if you have an anti-siphon valve (i.e.- a valve with a built in vacuum breaker), the vacuum breaker is always on the outlet side.
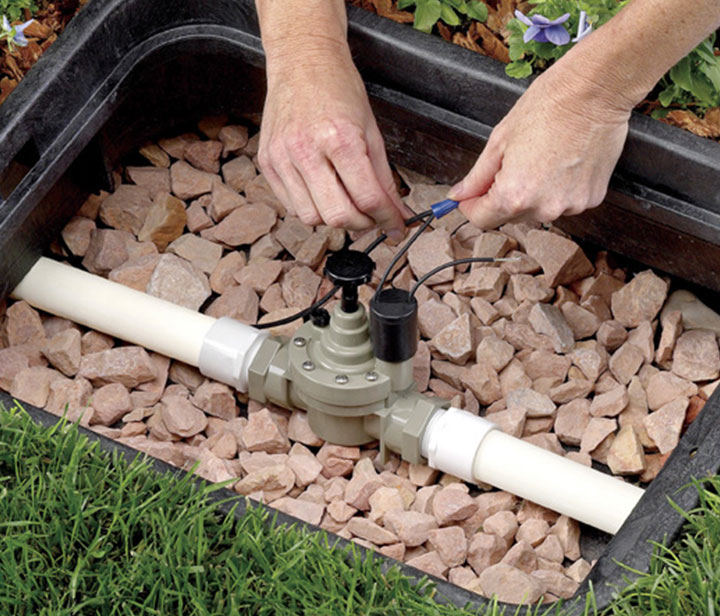
With Lawn Genie and most other types of solenoids, either wire can be connected to the Control (i.e.- Hot) wire or to the Common wire. One Control wire from each valve will hook to a separate Station (i.e.- Zone) terminal on the timer. These terminals should be marked 1, 2, 3 ... etc. depending on how many Stations your timer has (normally 4, 6, 9... etc.). The other wire from each valve will connect to with a wire which is connected to all of the other valves in your system. This wire is appropriately called the Common wire, since it is connected to all of the valves in common (it is best not to call this wire the Ground, since it should not be connected to Ground at any point). This Common wire is then connected to the terminal on the timer labeled "Com " or "Common".
No, what you have described is normal. The reason for turning the bleed screw is to release some pressure, and therefore some water, from the top of the valve’s diaphragm, which causes the diaphragm to open and water to pass through the valve. Once you close the bleed screw, it should stop seeping water, and the valve should close.
That is sometimes an area of debate, since people normally expect metal to be better than plastic. But that is not necessarily the case with sprinkler systems. The introduction of PVC and other plastic formulations to the sprinkler industry revolutionized sprinkler products, making lightweight, inexpensive and highly efficient components possible. Today’s plastic sprinkler heads generally do a better job distributing water while providing long life, all at a lower price. The higher pop-up heights found with plastic valves enable the spray to clear tall grass, providing more even coverage and eliminating the green "donuts" you often see around non-pop-up or low pop-up brass "mushroom-style" heads. It also eliminates the need to trim around the heads, since you can let the grass grow and mow right over a properly installed Lawn Genie All Purpose 2" or 4" pop-up head.
The number of sprinkler heads you can run at one time depends on:
- The amount of water each head uses, measured in Gallons Per Minute (GPM).
- The amount of water you have available at the valve, also measured in GPM.
- The water pressure at your property, measured in Pounds Per Square Inch (PSI)
- The size of the piping you will be using.
As you can see, this is not easily answered, since these factors vary for each system. To find these answer for your system, review the Lawn Genie Planning & Installation Guide, which will guide you through the planning and measurement process, or to make life easier by submitting your property information to the Lawn Genie Design experts. We will layout a customized sprinkler design for you.